
Share link basics
Share links let you create multiple unique links to the same reel, each with its own settings and tracking. Name links after recipients to see exactly who listened.
Jump to: Create a share link · Quick actions · Icon legend · Settings tabs · Rename or delete · Common questions
How do I create a share link?
When publishing a reel
The first time you click Save and publish in the Reel Builder, you'll be prompted to create your first share link. Name it (we recommend naming it after the recipient) and you're ready to share. You can also skip this step and create share links later.

From the reel detail page
For existing reels, go to your Reel library and click the reel you want to share.
- Click the + icon in the upper right corner (next to "Share Links") or the + Create share link button

- Give the share link a name. Naming it after the recipient makes it easier to track in your analytics.

- Click the chevron next to the link name (or anywhere on the row) to expand the settings tabs.

Quick actions
The Active toggle and Copy Link icon are quick actions that work without expanding the row.

Active toggle
Turn a share link on or off without deleting it.
- On (colored): Anyone with the URL can open the link
- Off (gray): The link can't be opened, but it stays in your list with settings and analytics preserved
The Active state applies to both the Standard URL and Personalized URL for that link.
Copy Link
Copies the link to your clipboard. If a Personalized URL is set, Copy Link uses that. Otherwise, it uses the Standard URL.
Icon legend (Options column)
Icons in the Options column show which settings are active for each link.

Options icons show which settings are active for this link.
- Pencil: Personalized URL set
- Padlock: Password required
- Calendar: Expiration date/time set
- Download: Downloads enabled
- Envelope: Email notifications enabled
- Eye-off: Tracking turned off
These icons are read-only indicators. Click the row (or chevron) to open the tabs and change settings.
Settings tabs
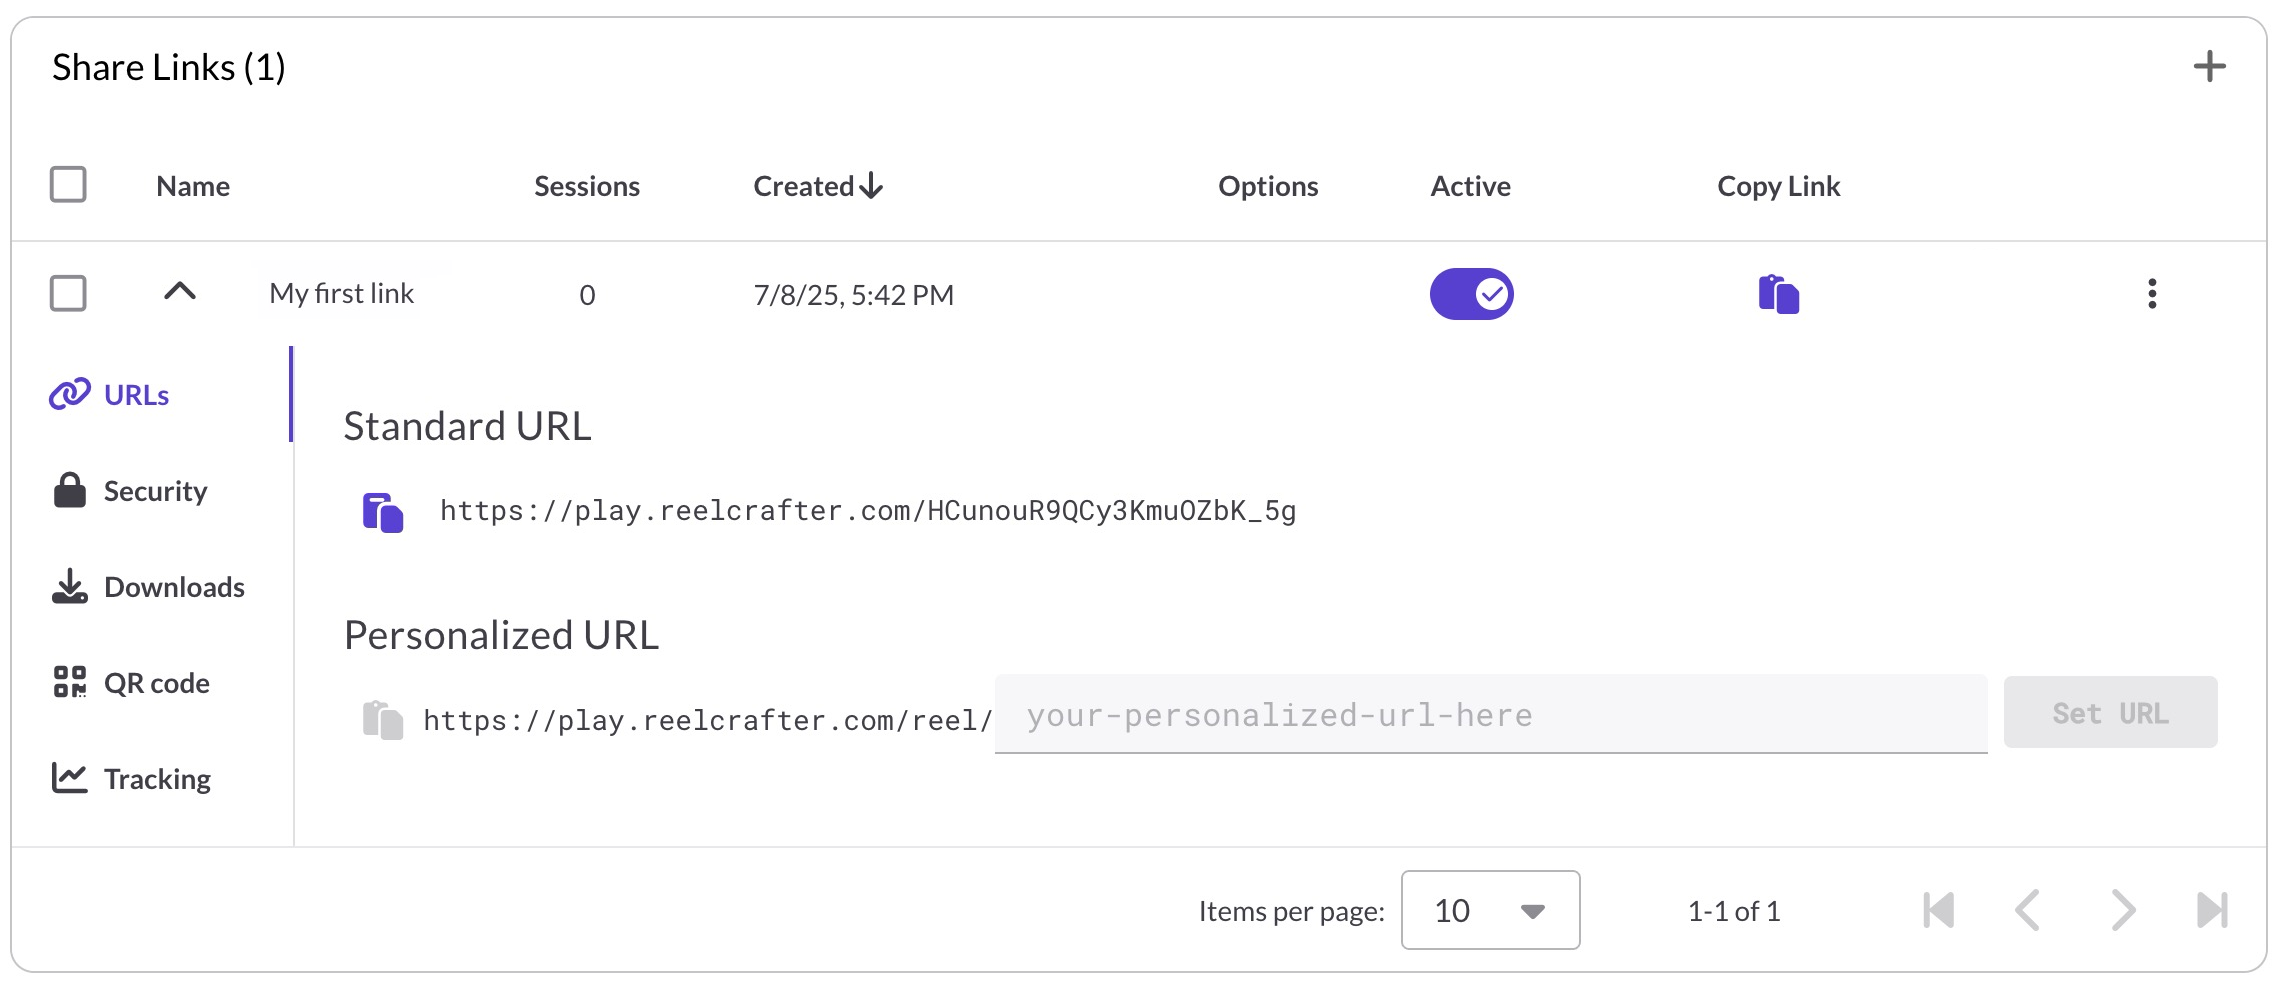
URLs tab
Configure the URLs for this share link.
- Standard URL: Always available for every link
- Personalized URL: Set a custom slug for a friendlier, branded URL (requires Starter plan or higher and a claimed username)
If you're on the Free plan, the Personalized URL feature shows an upgrade prompt.

Copy Link behavior: The Copy Link button copies your Personalized URL if one is set. If not, it copies the Standard URL. Both URLs work as long as the link is Active.
Security tab
Control who can access this link and for how long.
- Password: Require a password to view the reel (Professional plan)
- Expiration: Set a date/time when the link stops working (Professional plan)
- Search Visibility: Control whether search engines can index the reel (Starter plan or higher)
For details, see Share link security: Passwords and expiration.
Downloads tab
Control whether listeners can download audio and video from this link.

Audio Settings
- Allow audio downloads: Let listeners download audio in MP3 format
- Filename: Set the name of the ZIP file when downloads are delivered as an archive
- Download single tracks: Allows download of individual tracks (Professional plan)
- Download original: Allows downloading of the original full-quality audio file (Professional plan)
Video Settings
- Allow video downloads: Let listeners download hosted videos from this reel (Professional plan)
Good to know:
- Video downloads only apply to videos you upload to ReelCrafter. Linked videos from YouTube and Vimeo cannot be downloaded.
- Video downloads are transcoded versions, not the original file you uploaded
- Download original applies to audio only
- These settings affect this share link only and won't change other links for the same reel
QR Code tab
Generate and download a QR code for this link. Useful for print materials, presentations, or business cards.

Tracking tab
Control tracking and notifications for this link.

- Enable tracking: Track opens and listening activity (on by default)
- Email notifications: Get notified when someone opens this link (Professional plan). You can set a default for email notifications in Reel Settings → Sharing & Notifications. New share links will use this default, but you can override it per link. You can also mute all notification emails temporarily without changing individual link settings.
- Delete tracking data: Permanently remove all session history for this link
Note: Email notifications are only available for reel links, not playlist links.
Rename or delete a share link
How do I rename a share link?
- Find the share link in your list
- Click the three-dot menu (⋮) on the right side of the row
- Click Rename
- Enter the new name and click OK
Note: The rename option is in the three-dot menu on the collapsed row, not in the expanded settings tabs.
How do I delete a share link?
- Find the share link in your list
- Click the three-dot menu (⋮) on the right side of the row
- Click Delete
- Confirm the deletion
Deleting a share link permanently removes it and all its tracking data. The link stops working immediately. If you might want to reactivate the link later, use the Active toggle instead.
Common questions
How many share links can I create?
Free plans include 5 share links. Starter plans include 10 reels and share links. Professional plans include unlimited reels and share links.
What's the difference between Standard URL and Personalized URL?
The Standard URL is a system-generated link that's always available. The Personalized URL lets you create a custom, branded link using your username and a custom slug (like play.reelcrafter.com/yourname/project-name). Both URLs point to the same reel with the same settings.
Can I reactivate a disabled link?
Yes. Toggle the Active switch back on and the link works again immediately with all its original settings and tracking data intact.
What happens to tracking data when I delete a link?
All tracking data for that link is permanently deleted. If you want to preserve tracking history, disable the link with the Active toggle instead of deleting it.
Can I change settings for multiple links at once?
No. Each share link has independent settings. Changes to one link don't affect others, even for the same reel.
Why isn't my Personalized URL working?
Make sure you've claimed a username in your account settings. Personalized URLs require the Starter plan or higher and a claimed username.
Can I turn off all notification emails at once?
Yes. Go to Reel Settings → Sharing & Notifications and enable "Mute email notifications." This stops all notification emails without changing individual link settings.