
Uploading videos to your library
Users on the Professional plan can upload videos directly to their account (storage limits vary by plan). Uploaded videos provide the most detailed metrics on your Dashboard, including Video Play, Video Pause, Video Seek, and Video End.
Jump to: Uploading videos · Setting thumbnails · Common questions
Uploading new videos
To upload a video:
- Click Videos in the left navigation to open your video library
- Click the upload icon in the upper right
- Select a video file from your computer

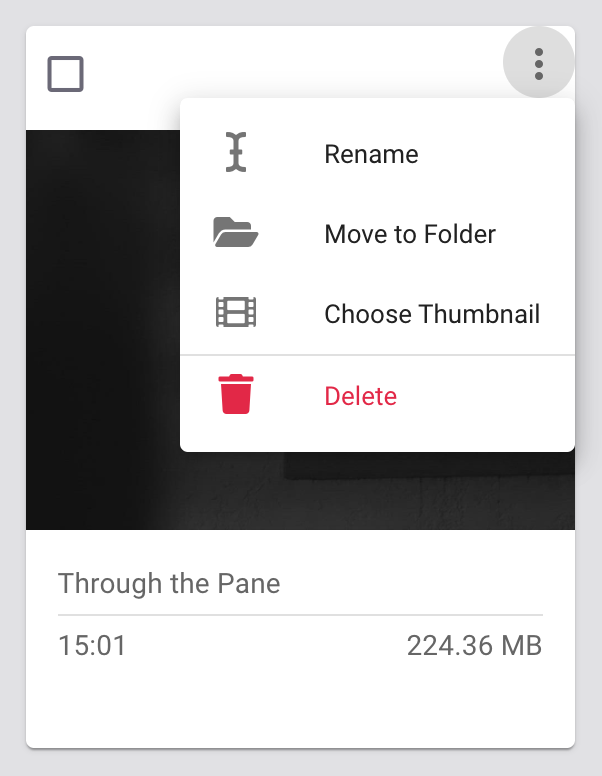
We recommend uploading high-quality MP4 videos. Once the video finishes processing, you can watch it, rename it, select a thumbnail, move it to a folder, delete it, or add it to a reel in the Reel Builder.
NOTE: You can also upload videos from within the Reel Builder's media block.
Setting video thumbnails
After uploading a video, you can set the thumbnail that appears when the video is used on a reel.
To set a thumbnail:
- Click the three-dot menu on the video card
- Select Choose Thumbnail
- Pick from auto-generated thumbnails or upload a custom image
For custom thumbnails, use a high-quality image with the same aspect ratio as your video for best results.

NOTE: Custom thumbnails are only available on videos uploaded directly to ReelCrafter.
Common questions
What video formats can I upload?
MP4 is recommended. ReelCrafter also accepts MOV, AVI, and other common video formats. Videos are transcoded to MP4 for playback.
Is there a file size limit?
Individual files can be up to 5GB. Your total video storage depends on your plan.
How long does processing take?
Processing time depends on video length and resolution. Most videos are ready within a few minutes. Longer videos may take more time.
Can I set a custom thumbnail for YouTube or Vimeo videos?
No. Custom thumbnails are only available for videos you upload directly to ReelCrafter. Linked videos use the thumbnail from the source platform.
What resolution should I upload?
Upload at the highest quality available. ReelCrafter transcodes videos to a maximum of 1080p for playback.