
Media: Adding audio, video, and images
The Media block is where you add audio, videos, and images to your reel. You can create playlists of audio tracks, add videos and images alongside them, and customize how everything displays.
Jump to: Overview · Playlist settings · Add audio · Reorder tracks · Rename a track · Remove track numbers · Snippets · Section headers · One vs. multiple blocks · Add videos/images · Common questions
Media block overview
When you expand a Media block, you'll see these controls from top to bottom:
- Layout: Choose "Playlists on the left" or "Playlists on the right"
- Display album art: Show album art next to the waveform when tracks play
- + Add playlist: Create a new audio playlist
- + Add media: Add videos or images

The Media block has two columns: one for audio playlists, one for videos/images. Use the Layout dropdown to control which side each appears on. If you only use one type of media, it displays full-width.

Playlist settings
Each playlist card has these settings:
- Expand track notes by default: Shows public notes expanded on the reel (otherwise viewers click to expand them)
- Show playlist title: Displays the playlist name as a section header above the tracks on the published reel
- Playlist title: The name shown on the reel if "Show playlist title" is on; otherwise, just for your reference in the builder
At the top right of each playlist card, you'll see icons to copy the playlist, duplicate it, or delete it.
Note: The Display album art toggle is at the top of the Media block, not inside the playlist card. It applies to all playlists in the block.

How do I add audio to a Media block?
- Click + Add playlist
- Click + Add tracks in the playlist card
- Select tracks from your Audio library using the checkboxes
- Click Choose X tracks
You can upload new tracks directly from the picker. Just make sure you're in a regular folder, not a Smart Folder or "All Tracks."

How do I reorder tracks?
Two ways:
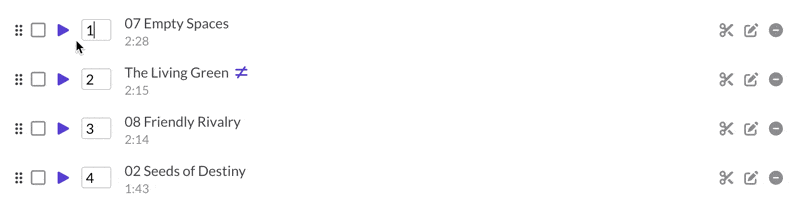
- Drag and drop: Use the drag handle (⋮⋮) on the left of each track
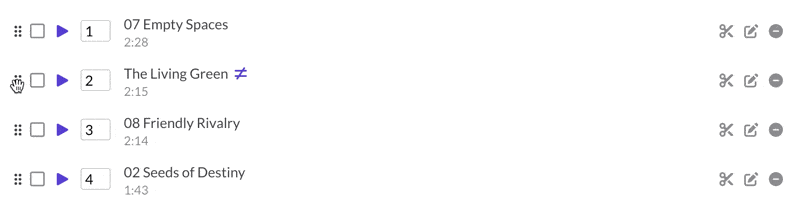
- Type a position: Enter a number in the order field to jump a track to that position


How do I rename a track on just one reel?
Click the edit pencil on a track to open Edit track details. Change the track name or public notes. These overrides only affect this reel, not the original track in your library.

Overridden tracks show a ≠ icon next to their name. Click the revert arrow (↺) in the Edit track details dialog to restore the original.

Tip: To hide a public note on just one reel, override it with an empty note.
How do I remove track numbers from filenames?
- Select tracks using the checkboxes (or click "Select all")
- Click the Rename tracks button that appears
- Check Remove leading track numbers
- Click Rename all


This creates overrides that strip "01 ", "02 ", etc. from the beginning of track names. Your library files keep their original names. The change only affects this reel. Tracks with overrides show a ≠ icon.
You can also use "Replace this / With this" to find and replace any text across all selected tracks. This also creates overrides.
Tip: To change the actual track names in your library (not just on one reel), use the same bulk rename feature in your Audio library instead.
How do I create a snippet (cutdown)?
Click the scissors icon (✂) on a track to open the Snippet Editor. You can create non-destructive cutdowns without affecting the original file.
See Snippet Editor: Create custom audio cutdowns for details.
How do I create section headers for different groups of tracks?
Add multiple playlists to a single Media block, then enable Show playlist title on each one. The playlist titles become section headers on the published reel.
To add another playlist, click + Insert playlist here below your existing playlist.
Should I use one Media block or multiple Media blocks?
Key concept: Each Media block has one waveform player. All playlists within that block share the same player.
Use one Media block with multiple playlists when:
- You want one continuous player with section headers
- Viewers should be able to play through all tracks in sequence
Use separate Media blocks when:
- You want completely separate waveform players
- Different sections need different videos/images alongside them
- You want other blocks (text, spacers) between audio sections
How do I add videos or images to a Media block?
- Click the + Add media dropdown
- Choose Images or Videos
- Select from your library or upload new media
 Videos and images appear in a column next to your playlists. Use the Layout dropdown at the top to control which side they appear on. You can reorder them by dragging, and remove them with the minus icon.

Plan note: Linked videos (YouTube, Vimeo, etc.) are available on all plans. Uploading videos directly to ReelCrafter requires the Professional plan.
Video settings
Hover over a video and click the play button to preview it in the builder.
Click the edit icon on a video to open Edit video details:
- Show video name on reel: Display the video title below the player
- Video name: Override the title for this reel only
Image settings
Click the edit icon on an image to open Edit image details:
- Caption: Text that appears below the image
- URL: Makes the image a clickable link
- Alt text: For accessibility and SEO
When to use additional Media blocks, or Video Gallery/Image Gallery blocks instead
In a Media block, all videos and images stack in one column next to all your playlists. You can't easily control which video appears next to which tracks. If you want more granular control (like a specific video next to a specific playlist section), use separate Media blocks instead to control where videos fall next to the playlists.
Also keep in mind: if you have more media than tracks, the video/image column can get very long and look uneven. And if you're only showing videos or images (no audio), each one displays full-width, making your reel very tall.
Consider using Video Gallery or Image Gallery blocks instead when you want to showcase multiple images or videos in a compact grid layout without audio.
Common questions
Can I show track numbers on the published reel?
The order numbers in the builder are for your reference only. They don't appear on the published reel. If you want numbered tracks, include the numbers in the track names (e.g., "01 Main Theme").
Can I use the same track in multiple playlists?
Yes. Add the same track to different playlists or different reels. Each instance can have its own overridden name and notes.
Why can't I upload tracks from the picker?
You can only upload from regular folders. If you're in "All Tracks" or a Smart Folder, navigate to a regular folder like "Unfiled" first.
What's the difference between a Media block and Image/Video Gallery blocks?
The Media block combines audio with optional videos/images in a two-column layout. Image Gallery and Video Gallery blocks display media in grid layouts without audio. They're useful for photo galleries or video showcases that don't need a playlist.
What does the ≠ icon next to a track name mean?
The track name or notes have been overridden for this reel (either manually or via bulk rename). The original track in your library is unchanged. Click the edit pencil and then the revert arrow to restore the original.
How do I change which side the playlist appears on?
Use the Layout dropdown at the top of the Media block. Choose "Playlists on the left" or "Playlists on the right."
What does "Display album art" do?
When enabled, album art appears next to the waveform when a track plays. If a track doesn't have album art, a placeholder appears. Turn it off for a cleaner look if most of your tracks don't have art.